

How To Repair Toilet Valve
How to Fix a Running Toilet
Check inside the toilet tank for a leaky flapper, bad fill valve, or overflow pipage at the incorrect peak.
![]() Time
Time
An hr or less
![]() Complication
Complication
Beginner
![]() Price
Price
Less than $twenty
Introduction
Fixing a running toilet is a lot easier than you might recall. In this article, we'll show yous how to identify and solve the problem. Don't exist intimidated by the plumbing. The fixes are straightforward, fifty-fifty if you don't accept whatever plumbing experience. And then stop wasting water and ready the toilet!
Tools Required
Materials Required
- May need new fill valve
Project step-by-step (v)
Footstep 1
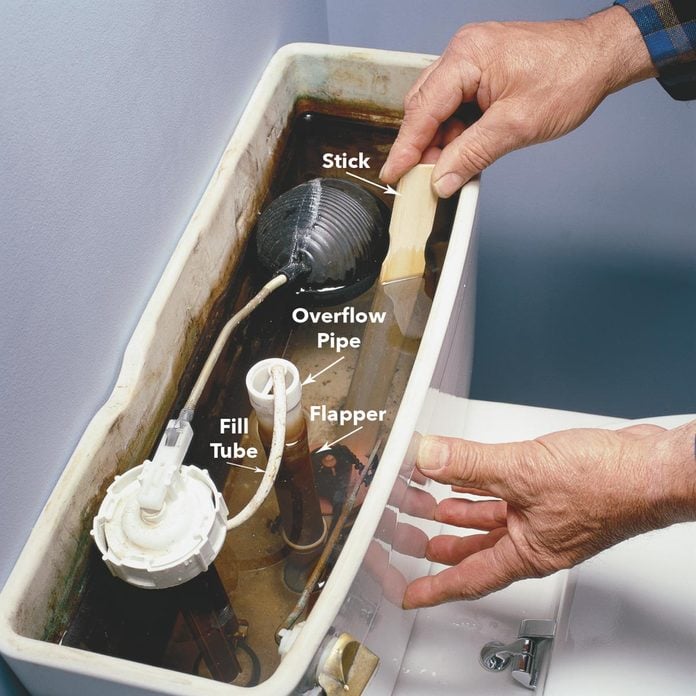
Test the Flapper
- Push downwards on the flapper with a stick when you hear the water running and listen for it to stop.
- If it stops, you know the flapper isn't sealing properly. Supersede it.
- Check the fill tube length and cut it back so it's at to the lowest degree 1/ii-in. to a higher place the water line.
- To replace the flapper, first shut off the h2o supply valve under the toilet (or the primary supply if the valve leaks!).
- Flush the toilet to drain out nearly of the h2o, then unhook the old flapper.
- Buy a new flapper of the same type and install it co-ordinate to the instructions on the package.
- Hook the flapper chain onto the flush lever arm so there'due south a little slack when the flapper is airtight.
Footstep 2
Check the Fill Valve for a Leak
- Flush the toilet and look for a fill valve leak.
- Lift upwards on the toilet float arm when the tank is filling to come across if the h2o stops.
- Curve or adapt the toilet float arm so the tank stops filling when the h2o level is 1/2- to 1-inch below the top of the overflow pipage.
- If the fill valve notwithstanding leaks, replace it equally shown in the side by side photo.

![]()
Footstep 3
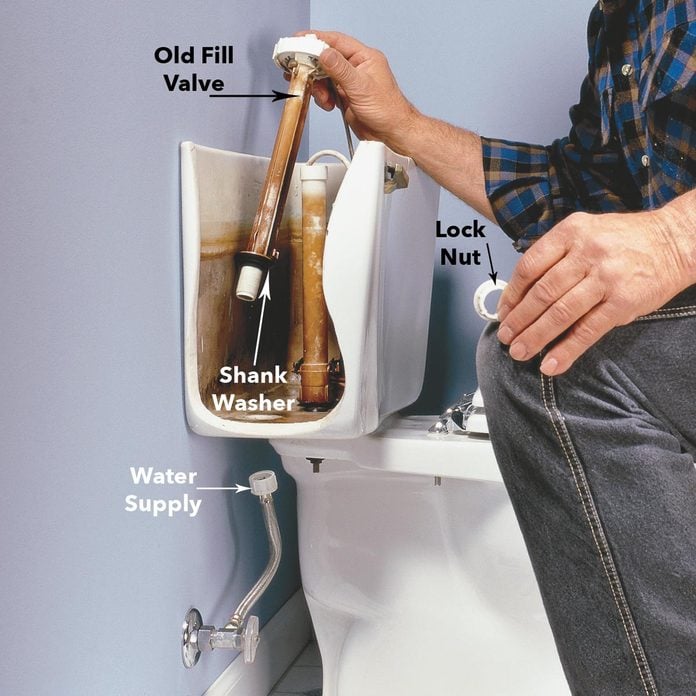
Remove and Replace Former Toilet Fill up Valve
- Plow off the water supply, affluent the toilet and sponge the remaining water from the tank.
- Disconnect the h2o supply line, unscrew the fill valve locknut and lift out the quondam fill valve.
Stride 4
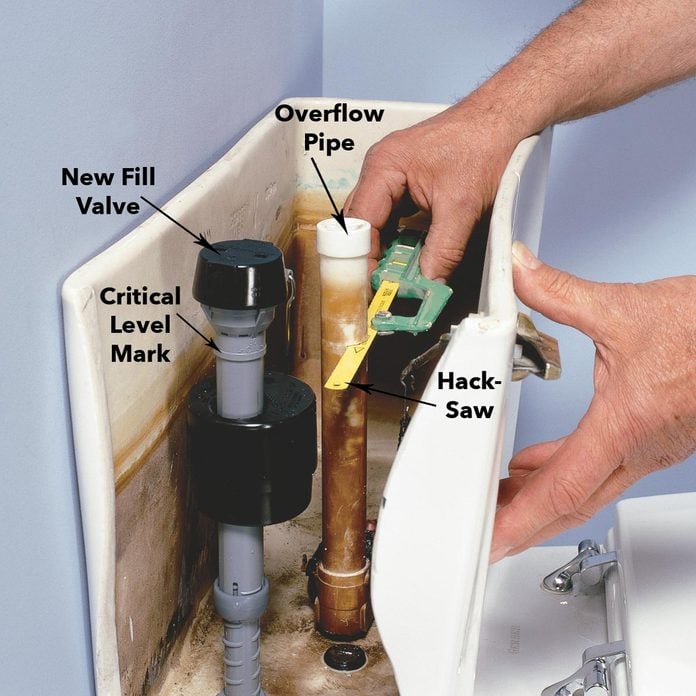
Install the New Fill up Valve
- Insert the new fill valve into the tank co-ordinate to the instruction canvas and tighten the locknut a half turn past hand tight.
- If the fill valve is at its maximum height, but the overflow piping is still higher than the disquisitional level mark, shorten the overflow piping with a hacksaw so it's one inch lower than the disquisitional level mark on the fill valve.
Step 5
Connect the Fill Tube
- Attach i stop of the new fill tube to the fill up valve nipple and the other to the enclosed angle adapter (shorten the tube to avoid kinks, if necessary).
- Clip the bending adapter onto the overflow pipage.
- Finish the installation by attaching the flapper chain to the affluent lever every bit described above.
- Plough on the water and exam-flush the toilet.

Originally Published: November 25, 2022

How To Repair Toilet Valve,
Source: https://www.familyhandyman.com/project/how-to-fix-a-running-toilet/
Posted by: rodriguezdrecandlere.blogspot.com
0 Response to "How To Repair Toilet Valve"
Post a Comment